


#12: Crafting through chaos
How art making has been keeping me sane, plus a fun craft you can try at home

I don't know about you, but keeping up with the news has made it hard for me to sleep. If I browse the Internet or pick up my phone for too long, I risk falling into despair and welcoming all of the psychosomatic symptoms that come along with that distress. It isn’t healthy or productive, and it’s eating at my mental health.
When I manage to tear myself away from doom, I've been trying to spend more time offline to self-soothe and absorb my surroundings. And what I've discovered is that I have a LOT of unused art supplies in my studio space. Some of it, like block inks and old paint markers, have gone bad, but I’ve been making use of the knick knacks that are still good to curate mini craft vacations for my brain. I call them vacations because they feel like small escapes for my brain to shut off completely from worry and tune in exclusively to the task in front of me.
If that sounds appealing, and if being an informed person of the world has also felt more intense than usual, read on for some Valentine's inspired crafting that will make your February a bit brighter.
Cheap and easy paper marbling
⭐ Bookmark this craft for an upcoming free evening or weekend afternoon when you could use a break…
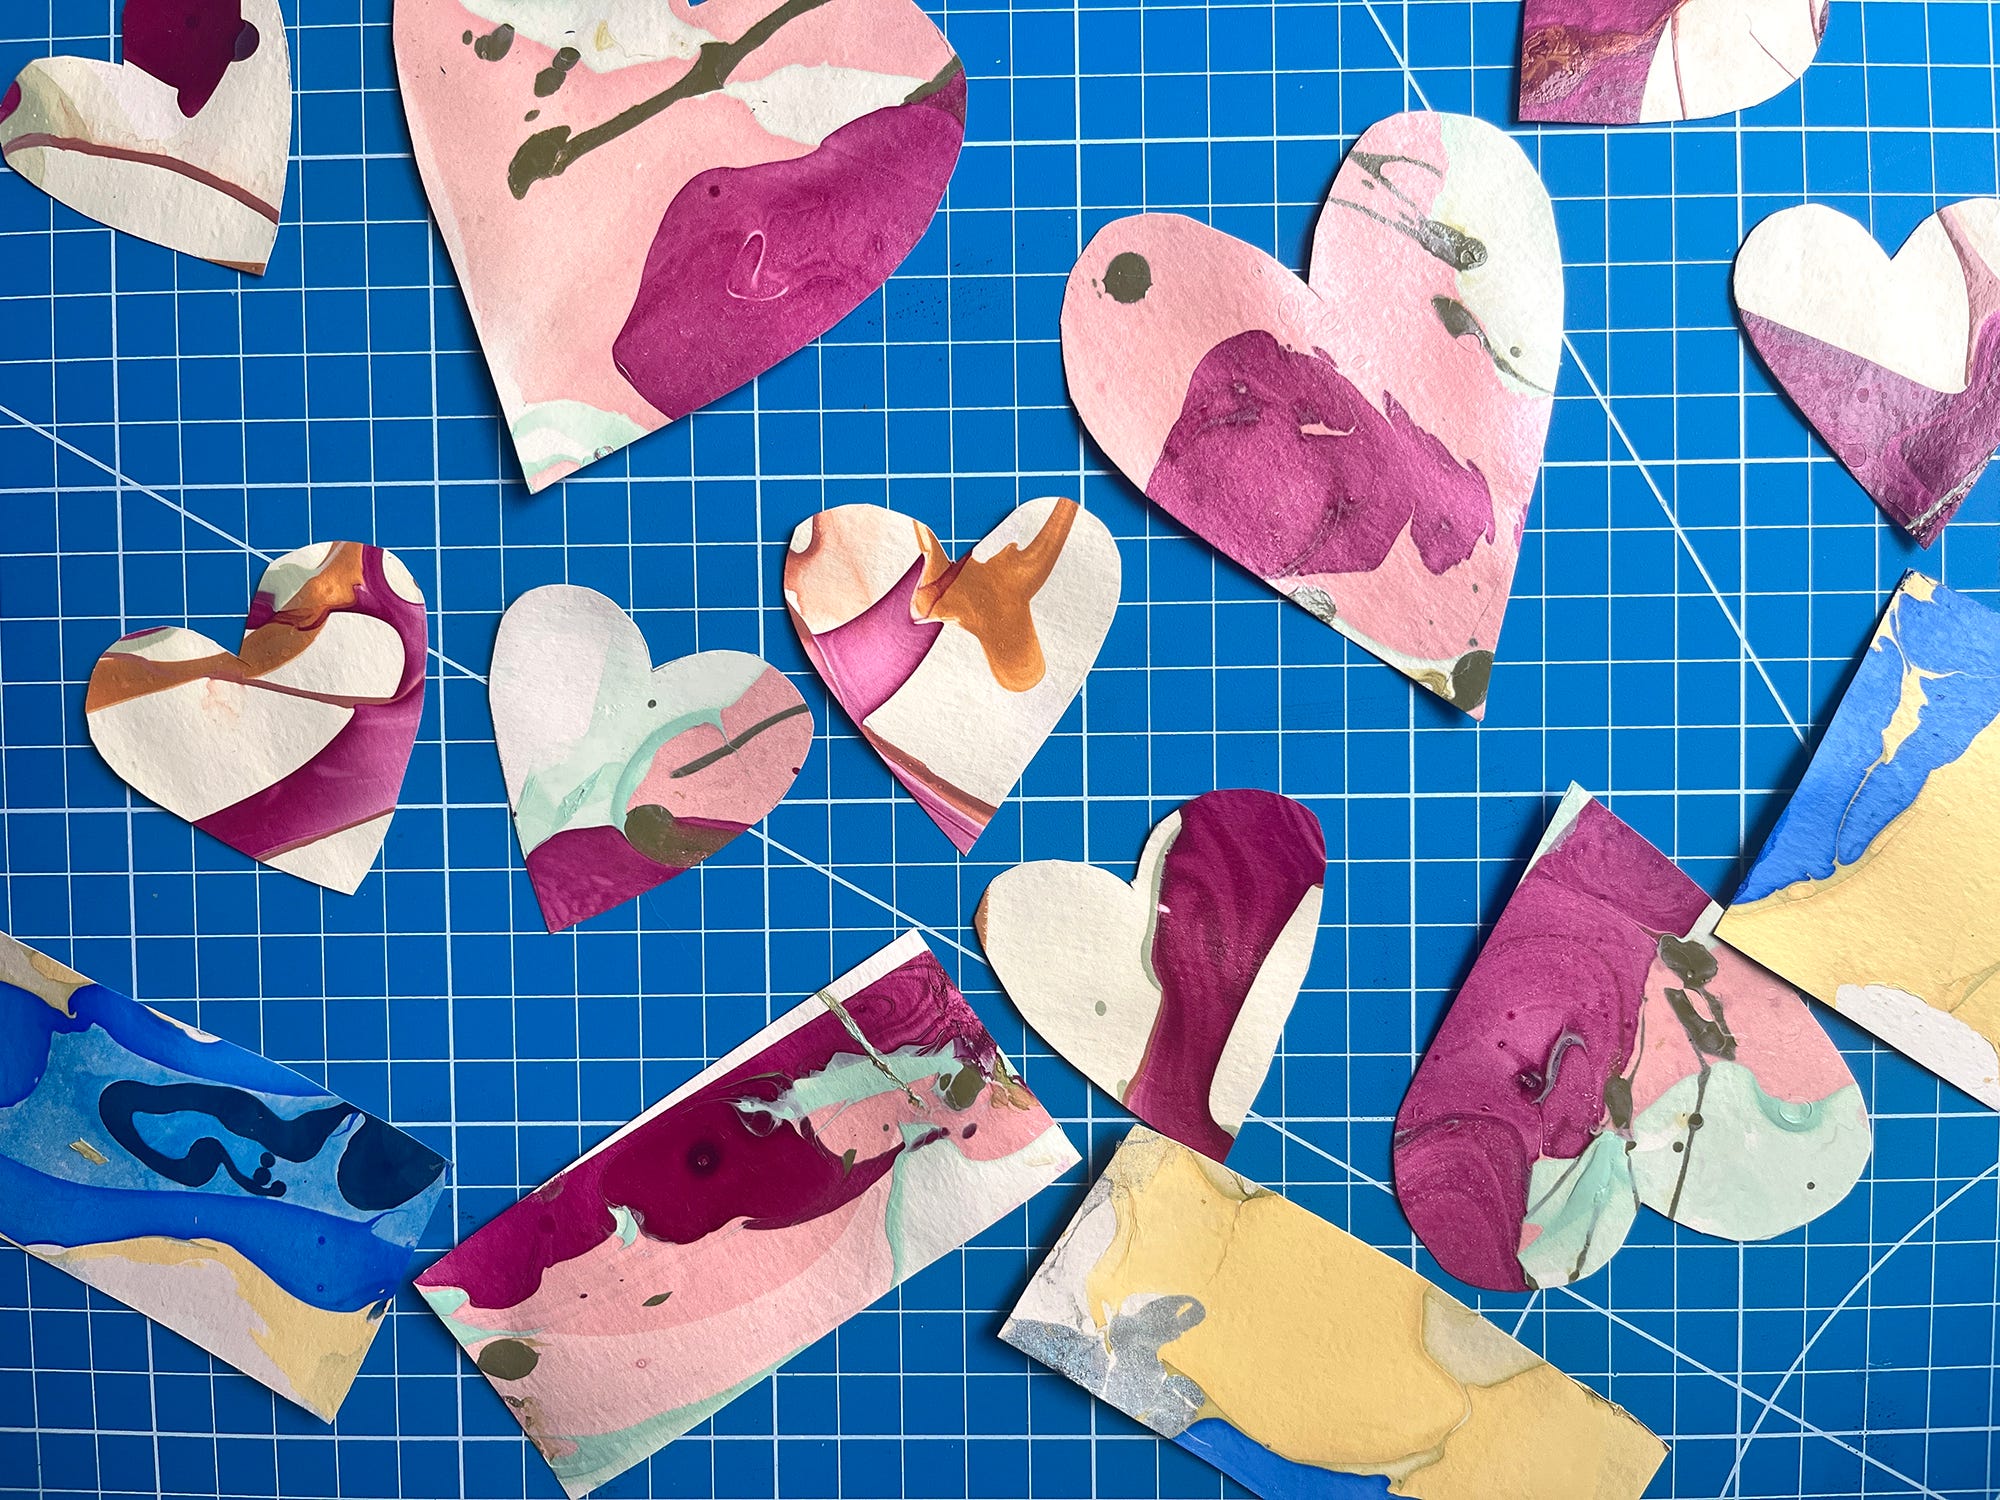
A couple of weekends ago, I invited my neighbor over so we could experiment with paper marbling and turn our sheets into Valentinian garland. Paper marbling can get quite complex and beautiful, with materials like carrageenan, alum, and specialty craft paper to create awe-inspiring designs. But I love a craft that requires buying next to nothing to have a good time, and I found this especially true for our version of marbling.
What you'll need:
A few bottles of nail polish OR high flow acrylic ink
Thick paper (I used 210g card stock from Paper Source since I had lots leftover. I wouldn't recommend something thin like printer paper, but many types like watercolor or mixed media paper will do)
A 9x12 metal disposable baking tray
Paper towels
Water and a metal sink (I did this in my kitchen. Would not recommend using a porcelain sink or bathtub)
A bottle of Acetone and cotton balls
Optional:
An X-Acto knife
Wooden skewers
Big plastic soup container
Steps:
Fill your metal tray no more than halfway with clean water.
Pick out a few nail polish colors to establish a pretty color palette. About 3-5 colors or textures (solid or metallic) will make for a nice pattern.
Moving quickly and starting from lightest to darkest color, pour a small amount of nail polish or ink into your water tray. Experiment with pouring in back and forth motions across the tray or dabbing the bottle to create dots and splatters.
Optional: lightly run a skewer across the very top layer of your design to create swirls and designs. This may be challenging to do with nail polish (see below in my tips), so unless you’re using high flow acrylic ink, feel free to skip this step.
Once you're satisfied with your design, lightly rest your sheet of paper on top of the water. You don't have to fully submerge the sheet - just allow it to sit on the surface.
Let your sheet rest for about 5-7 seconds to give the nail polish or ink time to bind to the paper.
Carefully lift your sheet out of the water by pulling it up by the edges or corners. If fragments of nail polish fluid from the rest of the water tray start to lift with it, you can use an X-Acto knife to cut them away from the edges of your sheet. Alternatively, leave them alone and the residual pieces will flake off when they dry.
Allow sheets to dry on paper towels. Sheets will be fully dry after about an hour or two, depending on the thickness of your paper.
Use cotton balls and acetone to clean up any surfaces that may have gotten nail polish on them.
Clean out your tray and refresh with new water. Then try it again!
Tips we learned:
The first layer of light colored nail polish we dropped into the tray seemed to dissipate immediately into the water and was the least visible color while crafting designs in water, but it made for a milky base layer on our paper. The more colors and layers we added, the easier it was to see our creations and the more control we had over color placements.
Small puddles of nail polish that sunk their way to the bottom of the metal tray had no effect on designs we made on the surface, so we stopped being as thorough about cleaning the metal tray between design rounds.
Nail polish got sticky pretty quickly upon resting in the water, which meant that running a skewer through the water sometimes gathered all of the nail polish around the skewer tip. You won't have the same problem if you use high-flow acrylic ink or work very quickly with your nail polish. Ultimately we found that the designs were still intriguing without using a skewer, but certainly less controlled.
If your tray is too full to safely lift it without spilling water everywhere, scoop up water with a plastic container to empty out cups of dirty water into the sink at a time.
Be proactive about cleaning off nail polish from the bottom of your sink in between changing out water, otherwise it gets annoying to wipe up. If nail polish sticks to your sink, saturate a cotton ball with acetone and press it onto the stain for a few seconds before giving it a little scrub. It should lift off with a bit of elbow grease.
When your paper is dry, compress sheets below a pile of heavy books overnight so they’ll lay flat.
What to make with your marbled paper:
Bookmarks
Gift tags
Note cards
Origami
Greeting cards
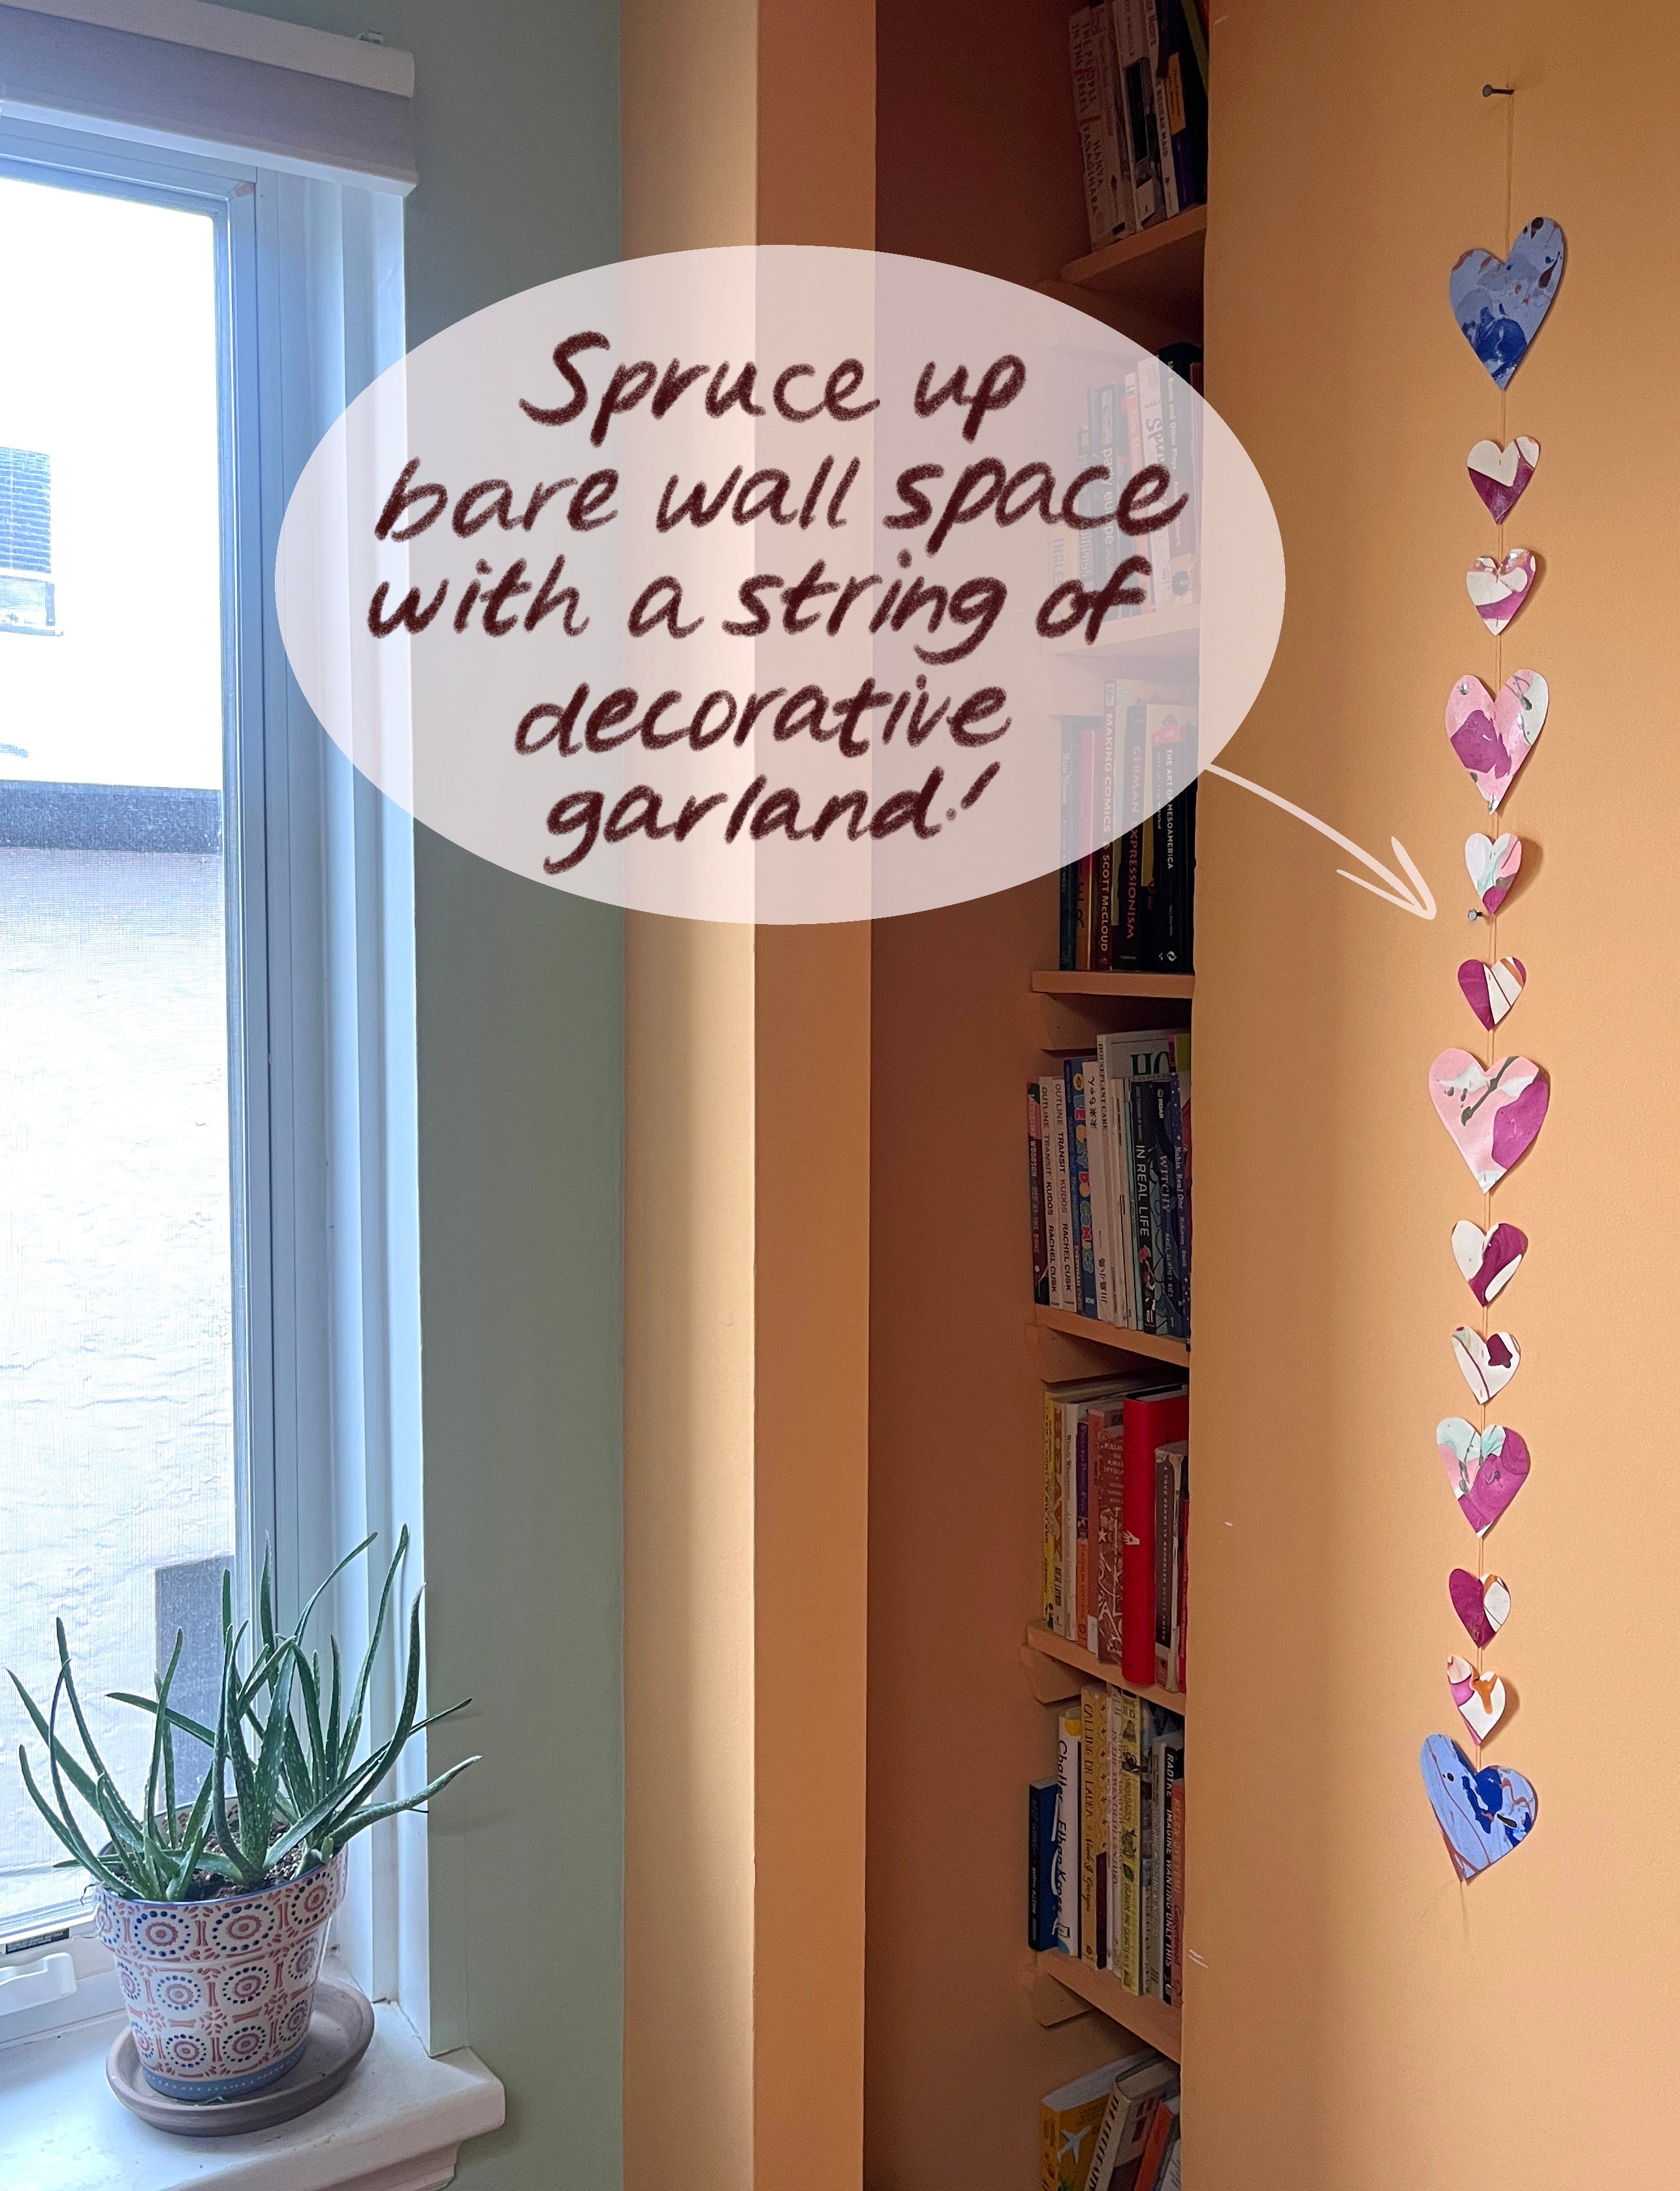
House decorations, like this:

I made a lot of marbled paper, so an extra string of garland now rests on the shelf above my fireplace, too. I used a sewing needle with a tiny eye and some pink thread to bind my marbled hearts together.
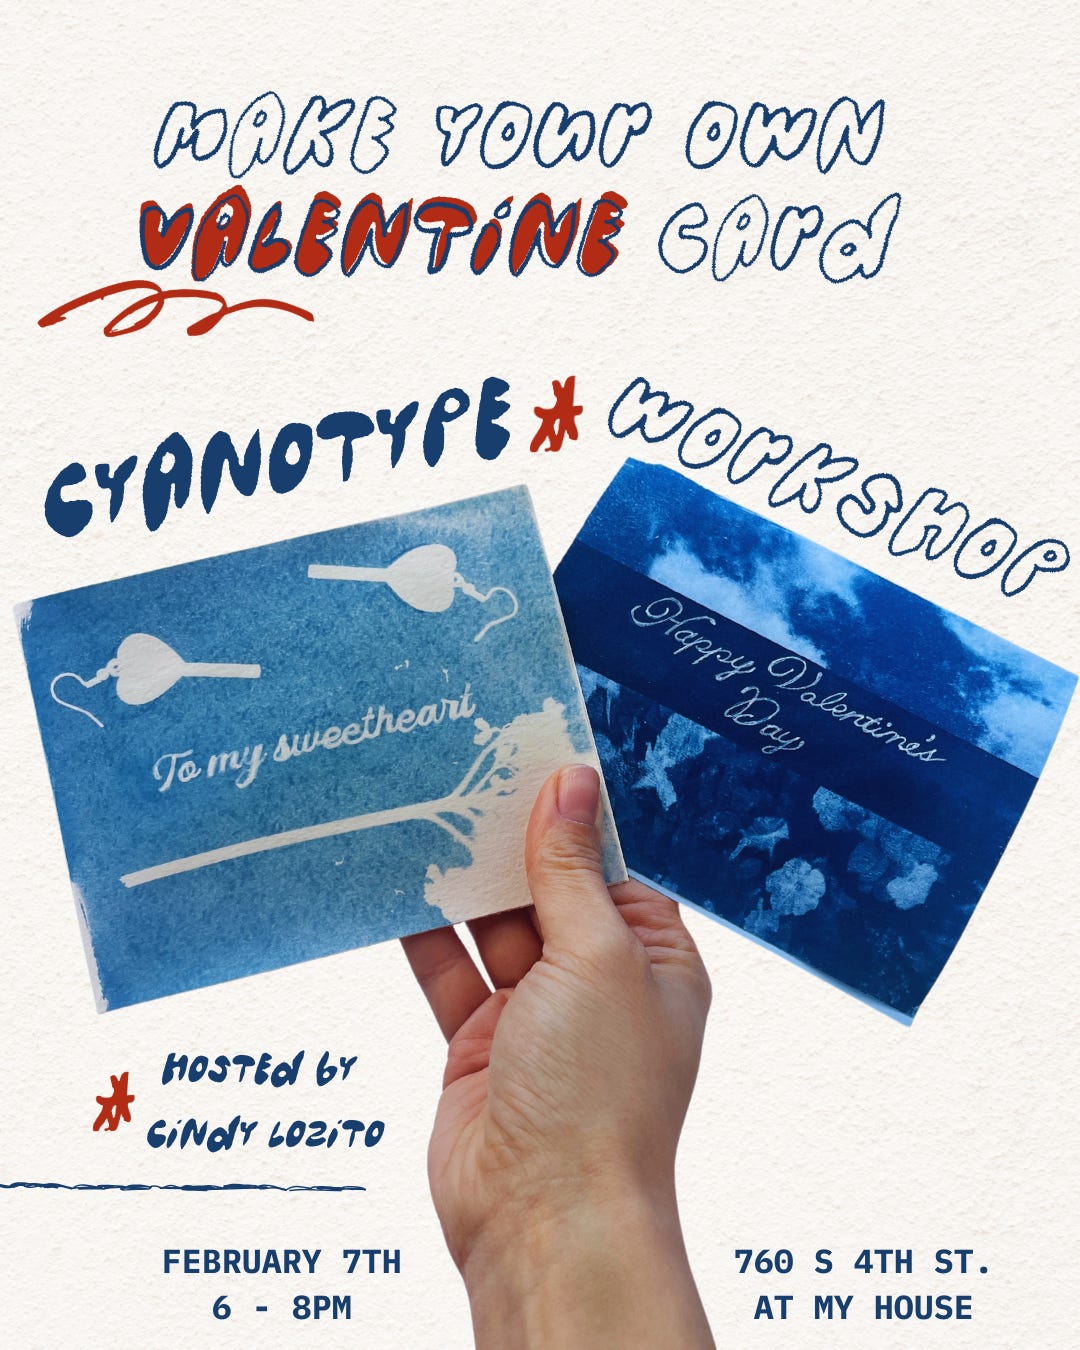
Cyanotype Valentines Workshop
I’m piloting new workshops this year, starting with a Cyanotype Valentine Card Making class at At My House (760 S 4th Street, Philadelphia) this Friday, February 7th from 6-8pm!
What exactly is a cyanotype?
It is a camera-less printing technique that involves laying out objects on a surface coated with iron salts to develop beautiful white and blue images with the shadows they cast. Cyanotypes are a popular technique for the summer since you can use the sun to develop prints, but we’ll be doing this indoors with my portable UV light. I've been teaching this technique since last year for school workshops, and I love seeing the compositions people create. I also find the Prussian blue color of cyanotypes so enchanting.
All materials will be provided, and no previous art making experience is required. Since this workshop takes place at a vintage & thrift store, our tableau of trinkets for composition making will be especially exciting. Everyone goes home with at least one card and envelope (though probably more) to send to lovers and friends. Come through!
Fleisher Print Love-In

I created the design for this year’s Print Love-In at Fleisher Art Memorial. It’s an annual Valentine's fundraiser event where guests get to experiment with printmaking techniques from block print to screenprint. Fleisher Art Memorial is an amazing facility to learn art making across so many different media; I've been learning how to screen print on fabric at the school this winter, and I’m a big fan of the handmade craft markets they host throughout the year. If you're unfamiliar with Fleisher or haven’t been there in a while, this would be a great way to learn more and get involved! Guests come home with cards they made of the bunny design, along with a cute tote bag.
–
Last thing: I'll be traveling in mid-March on a proper two-week vacation for the first time in my adult life. I'm still in disbelief that this is happening, and also sooo excited to share my journey with you when I return. Until then, if you've been looking to hire me for something in spring, now is the time to reach out!
Til the next one,
Cindy
I love this and want to try ✨